9 Easy Ways to Secure Your Facebook
With all the news about Facebook and its serious privacy issues, are you starting to feel alarmed by the amount of information you may be unintentionally exposing? You’re not alone.
With its birthdays, events, locations, photo albums, and friend lists, Facebook is one of the worst social media sites when it comes to holding huge amounts of your personal data. It’s the first port of call for anyone looking to find out more about you, whether that’s friends, family, colleagues, or — in the worst case — hackers.
One way to safeguard your privacy is to permanently delete your Facebook account. However, if you rely on it — as so many of us do — to stay in touch with the people in your life, that’s not always an option. So here’s your best alternative: take the safety measures we recommend here to secure your Facebook account and make sure that your sensitive information isn’t being compromised.
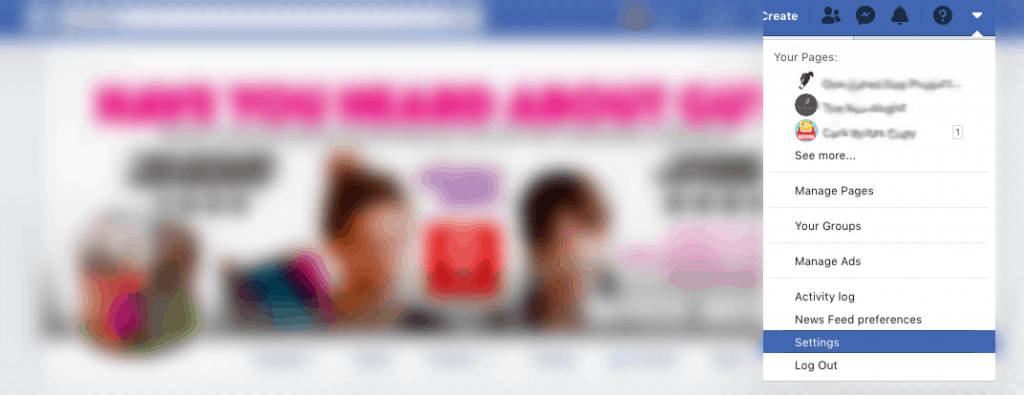
To get started, click the down arrow at the top right of your Facebook page, then click Settings.
1. Set Everything to Private
It sounds obvious, but the first and most important step you can take is to make sure your Facebook content is only being shown to people you trust. You’ll find the relevant settings in the Privacy tab under Settings.
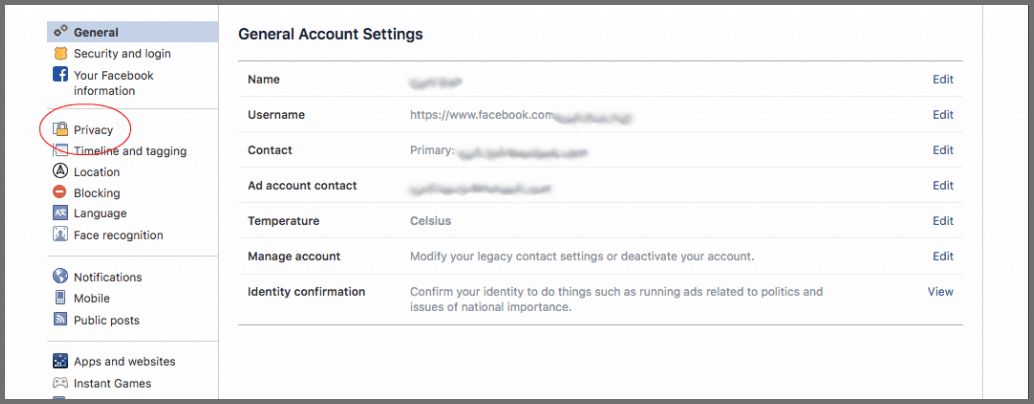
Here you can edit who is allowed to see your posts, send you friend requests, and find you through external search engines.
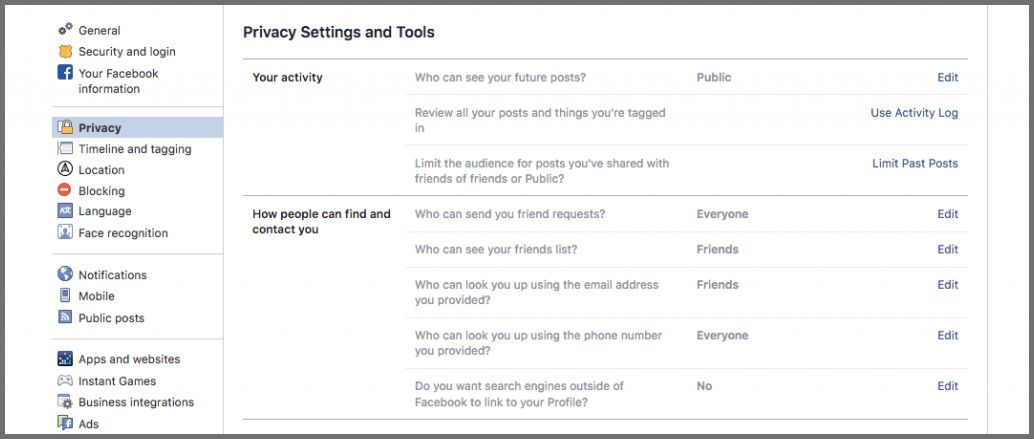
For optimum security, it’s best to set all settings to “Friends,” so only people you know can see your information. Some settings can also be marked as “Only Me,” to make them completely private. Or, you can choose to show things to selected friends only.
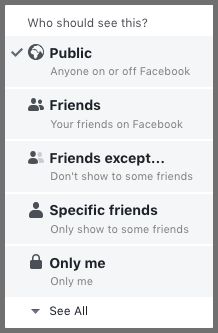
The Limit Past Posts options can also be useful if you’ve been on Facebook for a long time and don’t want new friends, colleagues, or employers to see your old posts and photos.
2. Secure Your Login
In early 2019, it was revealed that Facebook had accidentally been storing millions of users’ passwords in plain text. Although Facebook never found any breaches in the database, the error put millions of Facebook and Instagram users at risk of hacking.
You can’t do anything about Facebook’s insecure storage habits, but you can protect your own passwords by using a password manager.
Using the same password for all of your accounts is dangerous. Once a hacker has cracked one account, they will easily be able to access all your others. A password manager will create and store unique, strong passwords for all of your accounts — including Facebook. This will keep both your Facebook and other accounts secure in case of a security breach.
Another good idea to prevent anyone from accessing your account without your permission is to enable two-factor authentication. This can be found under the Security and Login tab under Settings.

Two-factor authentication will ask that you input an additional security code whenever you log in from an unrecognized device or location. You can even set up alerts to notify you whenever an unrecognized login occurs.

3. Take Control of Tagging
One of the trickiest things about maintaining your privacy on Facebook is that you have no control over what other people post. While you might not be able to delete someone else’s picture of you or post about you, you can take control of what you’re tagged in. These settings can be found in the Timeline and Tagging tab, under Settings.
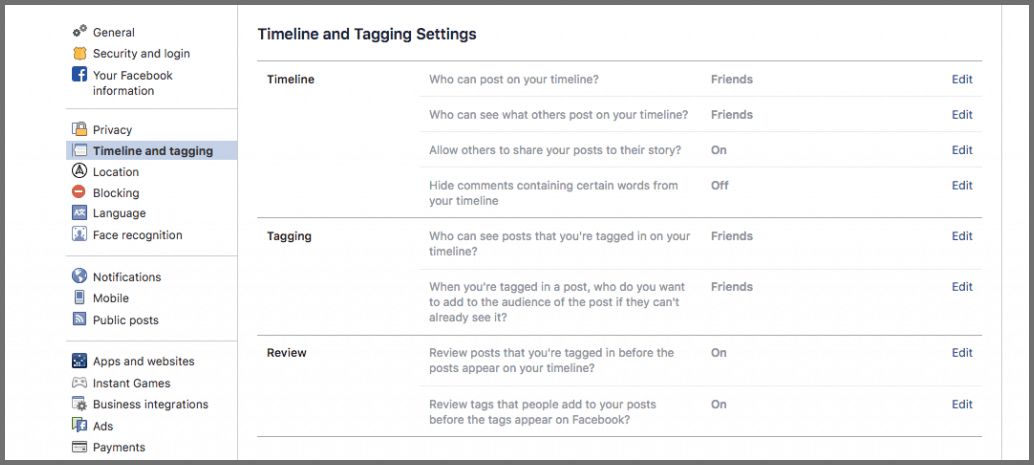
As you can see, these settings allow you to limit who can post to your timeline and who can see posts you’re tagged in. Turn on the Review settings, so you can check everything that’s posted about you before it becomes available to your friends.
4. Curate Your Friends List
Social media is a strange place, where our distant relatives can mingle with our bosses and our neighbors from five years ago.
It’s worth bearing in mind that not everything you post will be suitable for every person on your friend’s list. Luckily, Facebook offers a way to segment your friend’s list into different groups. When you post something, you can then choose which groups can see the post.
Segmenting your list can be a time-consuming process that involves selecting each friend individually and adding them to your desired list. However, once it’s done, you’ll have complete control over your fully curated friends list.

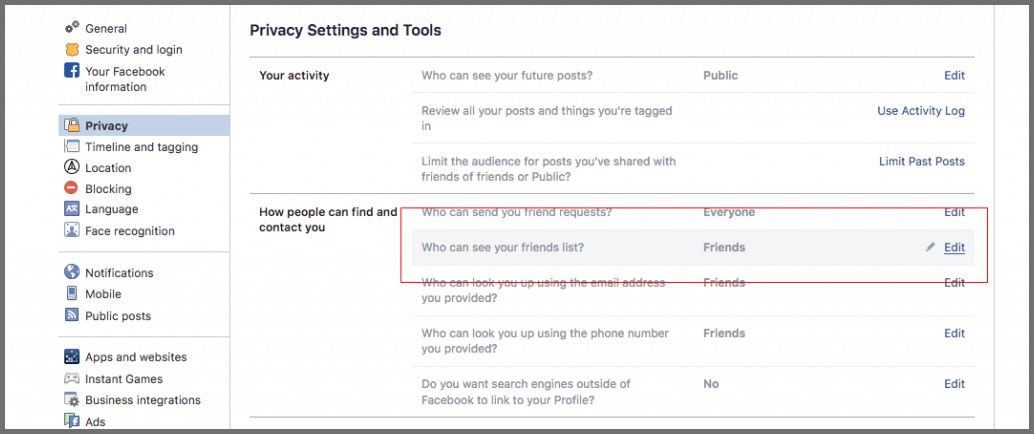
It’s also a good idea to take into account who can see your friends list itself. Your friends’ list is actually a detailed database of the people you know. From friends to family to coworkers, your friends’ list reveals a lot about you. To stop strangers from being able to see it, you can hide your friends’ list from everyone but yourself, your existing friends, or selected friends.
5. Understand Friend Requests
One thing that many people don’t know about Facebook friend requests is that, until you confirm or delete the request, that person will be able to see information about you on your profile and on their news feed.
You can edit your availability to friend requests in the Privacy tab under Settings, but it’s a good idea to go through your current requests and edit any you’ve been ignoring. If you have requested from people you don’t know, it’s best to cancel them right away and then mark them as spam if they look untrustworthy.

6. Turn Off Face Recognition
Perhaps one of the most worrying things about Facebook is that it stores hundreds of pictures of your face, from multiple angles.
Together with the other sensitive data that Facebook stores, such as your birth date, full name, family members’ names, schools, and hometown, you’re putting yourself at risk of social engineering and identity theft. Your best bet is to delete or lock down all of this information so that no one can see it but you.
One important part of this is to turn off face recognition. In the Face Recognition tab under Settings, click Edit, and then select No when Facebook asks if you’d like to activate face recognition.

7. Reexamine Your Apps
Every time you take part in a fun quiz, play a game on Facebook or log in to an app using your profile, you’re giving that third party access to tons of sensitive data. This can be risky in itself but becomes scarier when you consider all the data leaks that have recently been associated with Facebook.
To make sure that no unauthorized apps or sites have access to your account, go to the Apps and Websites tab under Settings and remove any active connections you no longer want to allow.
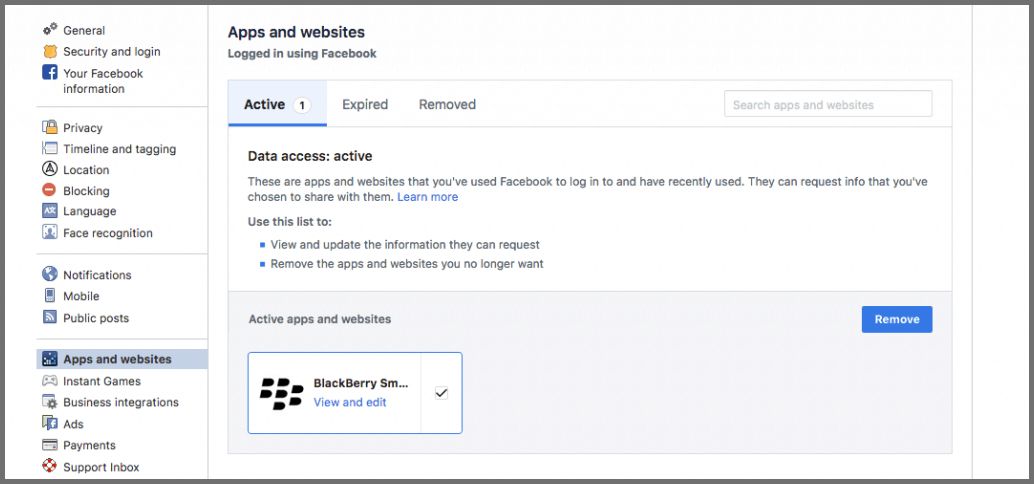
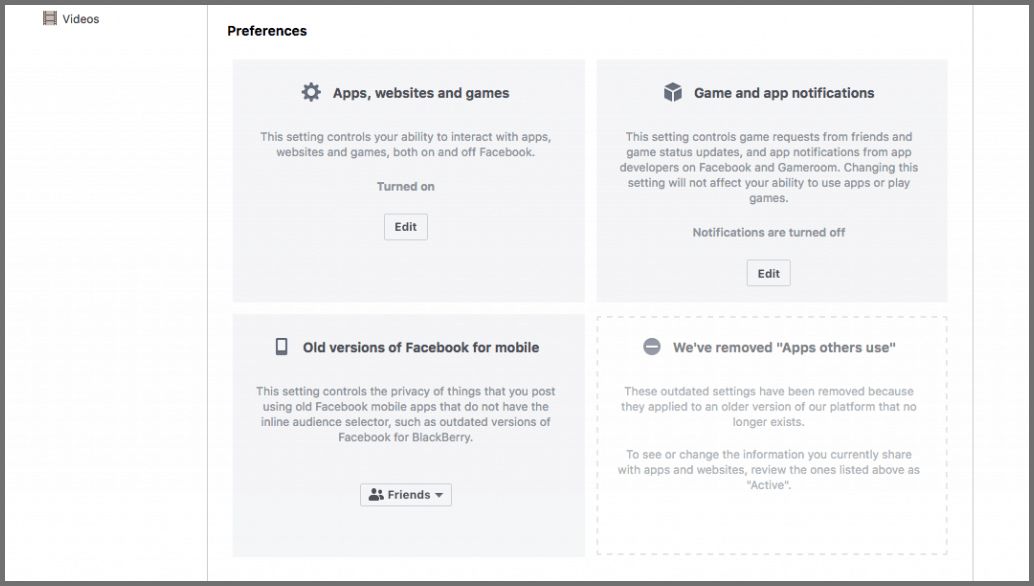
You can then scroll down to your Preferences to edit whether or not you allow apps and websites to connect to your Facebook account.
8. Hide Your Location with a VPN
Although you can turn off your location history (in the Location tab under Settings), unless you have all location settings disabled on all your devices, Facebook will always have access to your location via its app on those devices.

The only way to stop both your physical location and digital movements from being tracked is to use a VPN.
A VPN routes all your internet traffic through a private server in a different physical location, thus keeping any social media site or app from knowing where you really are.
VPNs mask your digital movements, too. Social media companies often share or sell this information to third parties, who use it to send you targeted advertising.
Our recommendation for a top VPN is NordVPN. Take a look at these excellent user reviews to find out why.
9. Edit Your Legacy
Our own mortality isn’t something we like to think about. Unfortunately, the reality is that Facebook holds a great deal of sensitive information about us that we lose control over once we pass away.
To prevent any misuse of your profile or data, you can choose a “Legacy Contact.” This is a Facebook friend who will manage your profile should anything happen to you.
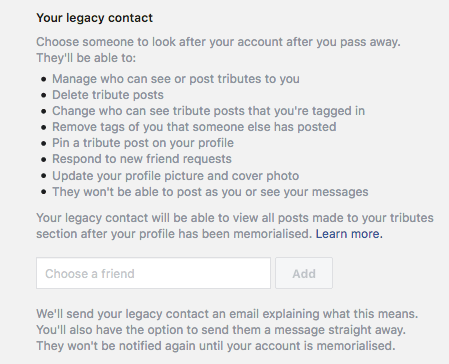
If you’d rather your account would be simply deleted, scroll down and click “Request that your account be deleted after you pass away.”
Further Reading
There’s no completely safe way to use Facebook, but changing the settings we’ve outlined here will protect your account as much as is possible.


